


While I'm obsessed with all things beauty related, I'm also incredibly realistic when it comes to my own beauty routines. I know I'm supposed to exfoliate 3 times a week or slap on a moisturizing mask when I go to bed - but honestly? Some days, there's just no time! Instead, I try to focus on beauty routines that I can maintain and that are more forgiving when it comes to those moments when I just can't get around to them!
One of my go-to beauty staples to save myself time and money is doing my own gel nails at home. I have always been a bit of a nail junkie but when my hectic college schedule hit, I couldn't keep up with how quickly my normal nail polish chipped off. Since I'm not loaded with money, regular trips to the salon just weren't an option so I started researching online and discovered kits that allow you to do your own gel nails.
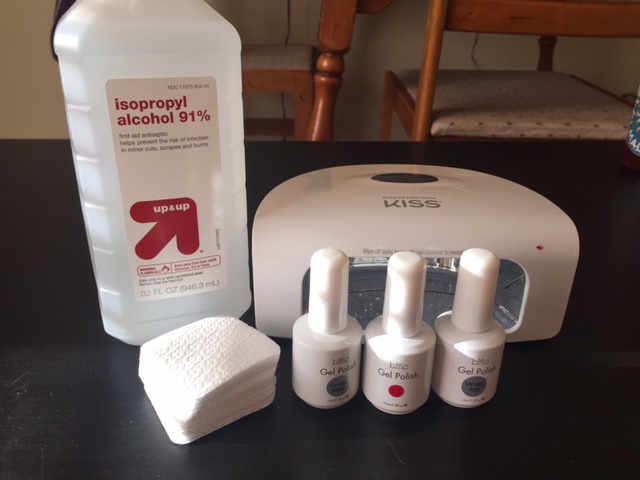
The gel kit I have is the Kiss Gel Kit, but it looks like it is no longer sold as a kit. The original set included: LED lamp, gel top coat, gel base coat, and three gel colors. Since then, I have replaced the original set with BMC colors and gel/base coats. Most sets come with instructions on how long to cure the polish or how to file your nails beforehand.
Pros:
- My nails look much more professional because they don't chip as easily. The gel polish make my nails appear put together for a longer period of time.
- Doing gel nails on my own saves me so much money in the long run - It is definitely worth the initial investment.
- After the polish is cured, there is no risk of denting or scratching before the polish dries. Once it's cured, you're good to go!
- A side benefit that I've discovered is that the gel layer has actually allowed my nails to grow longer. I have very weak nails that usually break as soon as they hit my fingertip so having the gel polish there provides another layer of support.
Cons:
- The initial investment can be between $40-$100 or more which can be quite a barrier - but as I said before, I really think it's worth the plunge.
- The whole gel nail process can take much longer than average nail polish because each gel layer has to be cured before it will dry. I've found it best to set aside an hour or so dedicated to doing my gel nails (usually during an episode of The Voice)
- While salon gel manicures typically last 2-3 weeks, my diy gel nails last 1.5 weeks on average. I am still working on fine tuning my methods to figure out what the best practices are for making my nails last longer.
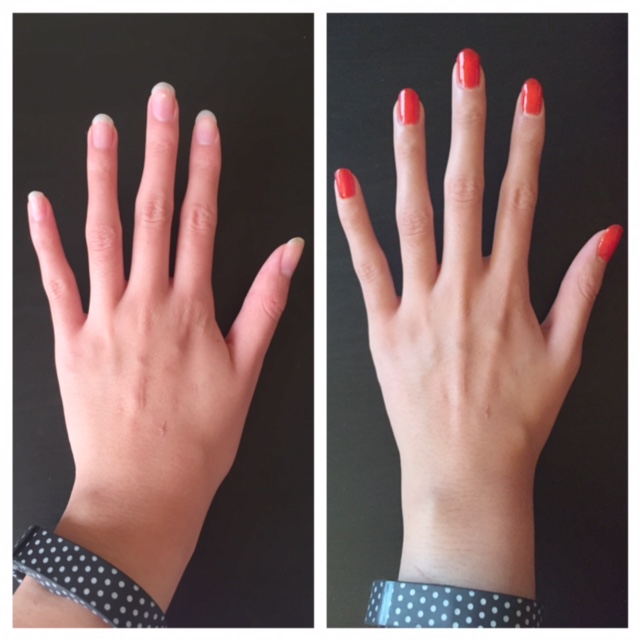
Before & After
Tips:
- After doing some research online, I discovered that the gel cleanser that is used to remove the tacky layer off of your nails is actually very close to rubbing alcohol - so instead of spending $5 on a tiny bottle of gel cleanser, I spent $2 on a giant bottle of rubbing alcohol and haven't run into any problems!
- My instruction sheets say to cure base and gel coats for 30 seconds and color coats for 60 seconds but I have found that doubling these times has made my nails last longer.
- There are two lamp options when it comes to gel nails - either UV or LED. As with any other UV exposure, there is some risk involved. I highly suggest investing in an LED lamp instead of a UV lamp so that you don't have to worry about any of these risks!
Are you as obsessed with diy gel nails as I am?! I'd love to hear your thoughts!
love, ella